This is going to be a quick post about getting started with KVM. If you have used a type-1 hypervisor before, then you will be familiar with the topology used here. The adding of openvswitch is to allow trunk ports on our virtual switches. By default, most hypervisors only have access ports. To complete this setup you need a physical networking device that can do trunking (switch). Either a linux machine with a graphical desktop or windows machine with WSL installed. Two available ethernet ports on your computer. One connection for management. The other connection will be the vm trunk. I will be using Ubuntu 20.04. The hypervisor can be hosted on your server or ubuntu desktop. In this tutorial I’m using Ubuntu desktop 20.04.
sudo apt -y install bridge-utils cpu-checker libvirt-clients libvirt-daemon qemu qemu-kvm
#Install virt-manager and ssh-askpass-gnome
#The below command will launch virt-manager, connecting to the specified server with the #designated port and key.
virt-manager -c ‘qemu+ssh://username@0.0.0.0:port/system?keyfile+id_rsa’
sudo apt-get install virt-manager ssh-askpass-gnome –no-install-recommends
#Verify system virtualization capability
kvm-ok
#Verify needed users are part of libvirt group
cat /etc/group | grep libvirt
sudo usermod -aG libvirt <username>
sudo apt install openvswitch-switch openvswitch-common
#Before we create the bridge, you should have an interface picked out. #
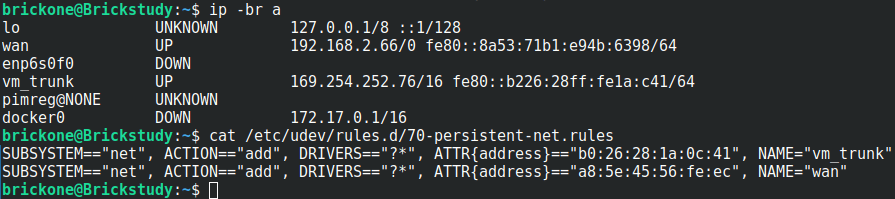
#Giving the interfaces a distinguishing name can assist with troubleshooting.
#You can create a text file in the /etc/udev/rules.d/ directory named #70-persistent-net.rules. The changes will not apply until you reboot the system.
SUBSYSTEM==”net”, ACTION==”add”, DRIVERS==”?*”, ATTR{address}==”interface_mac_address”, NAME=”new_name_of_interface”
#After we pick our interface, we can define, create our bridge and add it to #kvm.
sudo ovs-vsctl add-br bridge ← defines bridge
sudo ovs-vsctl add-port bridge port ← Adds interface to bridge

#You can also add an internal port for your VM network
ovs-vsctl add-br internal0 — add-port internal0 port0 — set interface port0 type=internal
#You only have to add the tagging to the bridge and interface once.
#The vms’s interface tag configuration will have to be applied again if there is a restart.
#We will make a #simple script to find our desired vm interface and give it the tags we want.
sudo ovs-vsctl set port br1 tag=99 ← Sets the vlan tag of the interface
sudo ovs-vsctl set port br1 trunks=[2-250]
# ^Sets the vlans on the trunk, can be a range as well as separated by commas
sudo ovs-vsctl set port br1 vlan_mode=native-untagged ← Sets the interface to use native vlan

#The bridge is down when created. We should bring the bridge up and #assign an address to it.
#The configured address should be in the subnet of the tag on the bridge.
#For me vlan 99 = 192.168.0.0/24
#The below commands will not persist after a reboot.
sudo ip addr add 192.168.0.6/24 dev br1
sudo ip link set br1 up

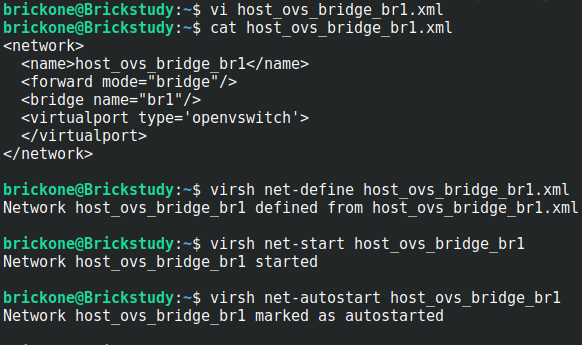
#The above commands import the bridge into KVM, start the bridge, then
#enable the bridge to start on system boot.
#You can now create a vm via the command line or the gui.
#We can open up virt-manager and start installing our first vm
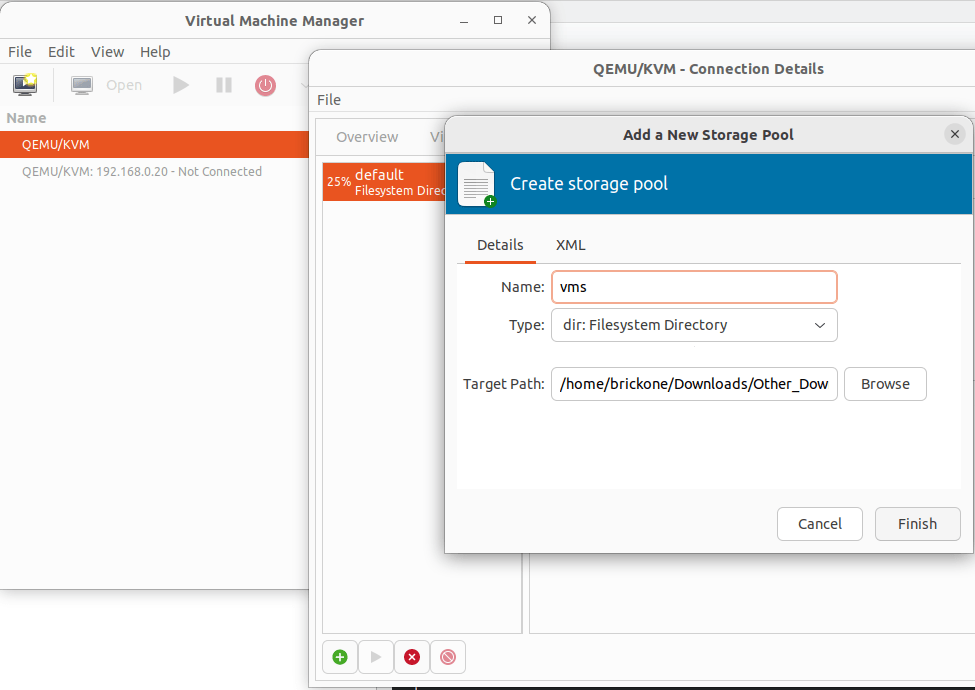
#Start by creating the storage pools. These are the locations of your vms and installation images.
#Double click the Qemu/KVM

click the green plus sign to create the storage pools

Verify in the Virtual Networks tab that our bridge is listed

Click File> New Virtual Machine
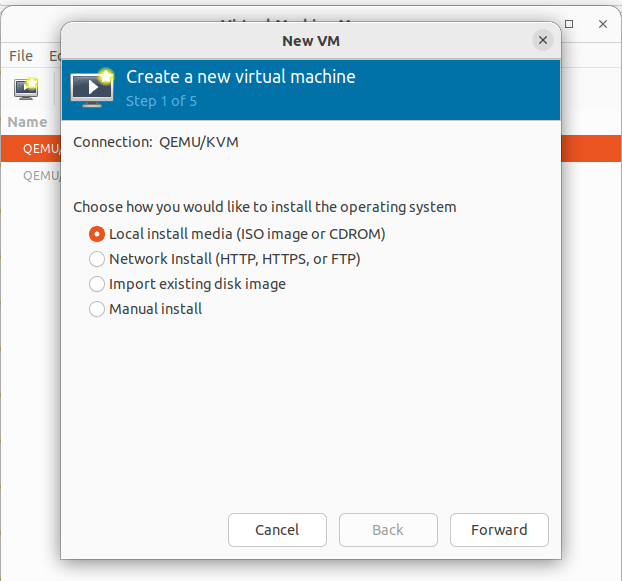
To install from an ISO file pick Local Install > Browse to the iso file on the configured storage pool. If you previously added the image to the folder. Click refresh, highlight your selection and click choose volume.


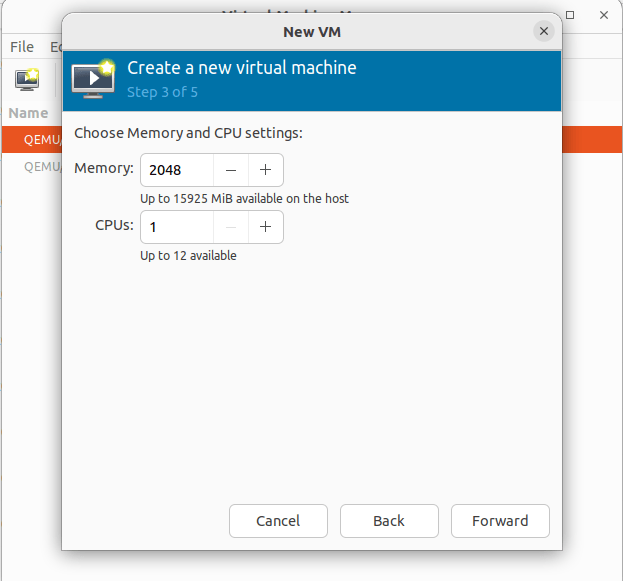
Set the desired memory and cpu settings for this vm
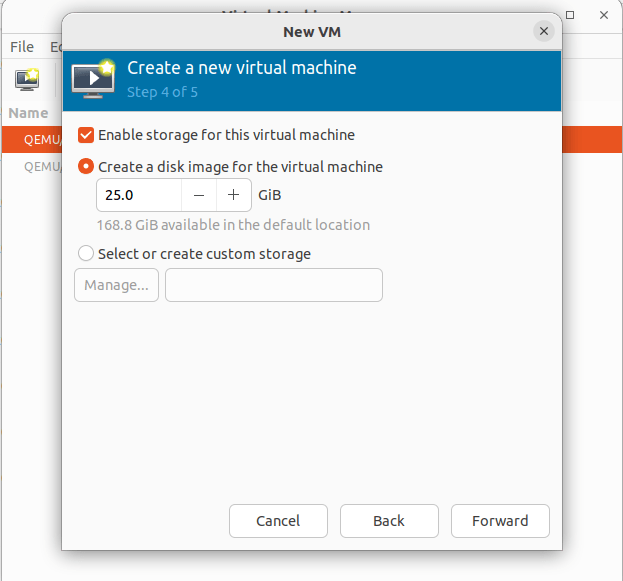
Create an hard drive image for the machine. You can change where the drive is located by clicking the Select or create customer storage option.
All storage options can be altered later. Just like the default for creating a vm.


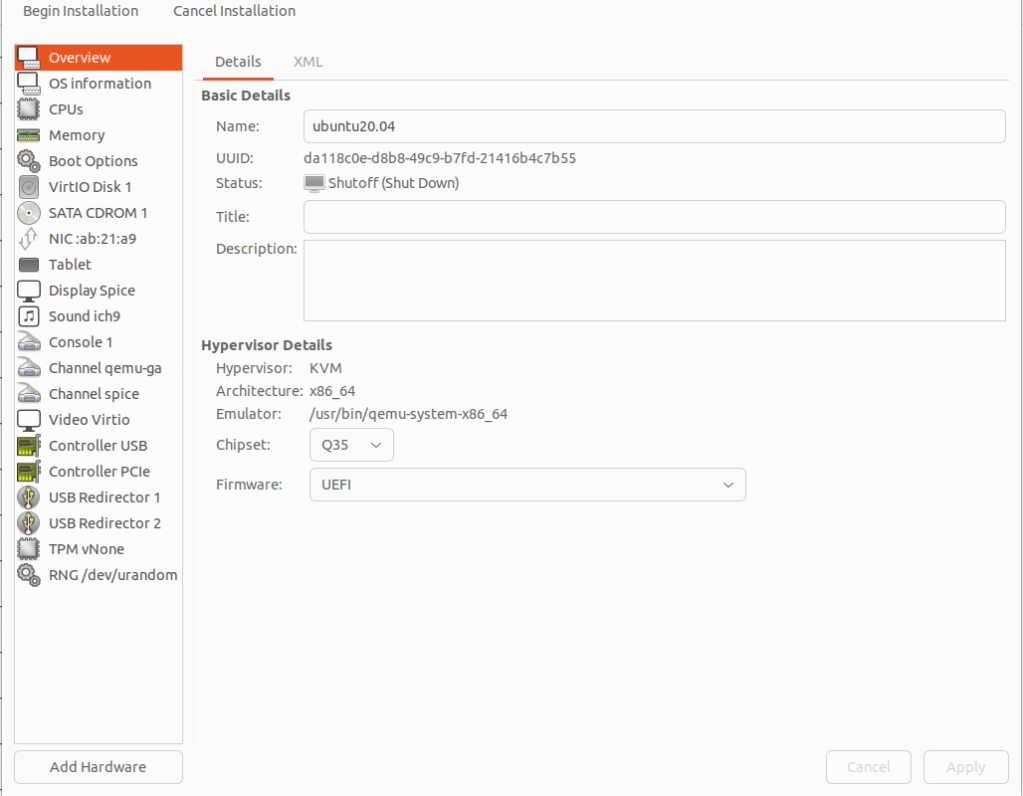
Changing the vm name can be done during or after creation. Click customer configuration before install to alter the vm before launching for install. This is needed if UEFI isn’t set as a default. The network selection should be set to our created openvswitch bridge.

Click finish, then select overview. If your OS requires UEFI to boot. Under the Hypervisor Details section, click the firmware tab and select UEFI. If everything is correct click begin installation.

Select you language of preference
If you have trouble viewing, click view>resize vm

At the above screen, we need to go back over to our command line.
Making a script will be much easier as the amount of vms grows.
We need to set the tagging so the vm can communicate.

Lets grab the last six of the mac address and add it to our script
You can get it from the installation screen as well

#You can place the script in one of the default system paths for programs.

sudo touch /usr/local/sbin/ovs-config.sh
sudo vi /usr/local/sbin/ovs-config.sh

We need to make the script executable.
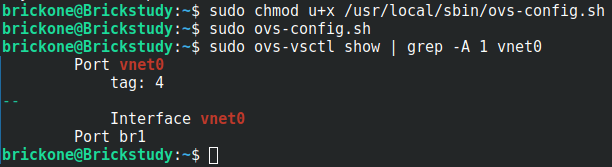
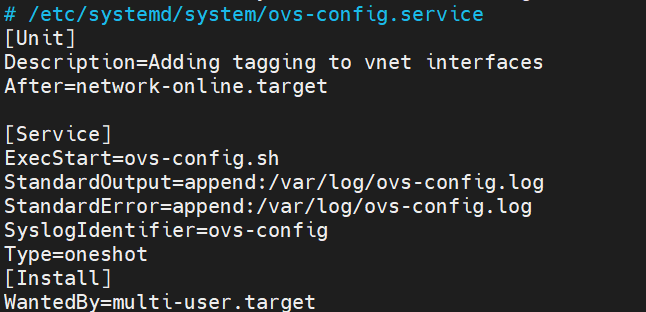
Then add it to a cron job. Whichever works best for you. When the VMs are restarted, the vnet interface is destroyed and is recreated when the VM comes back online.
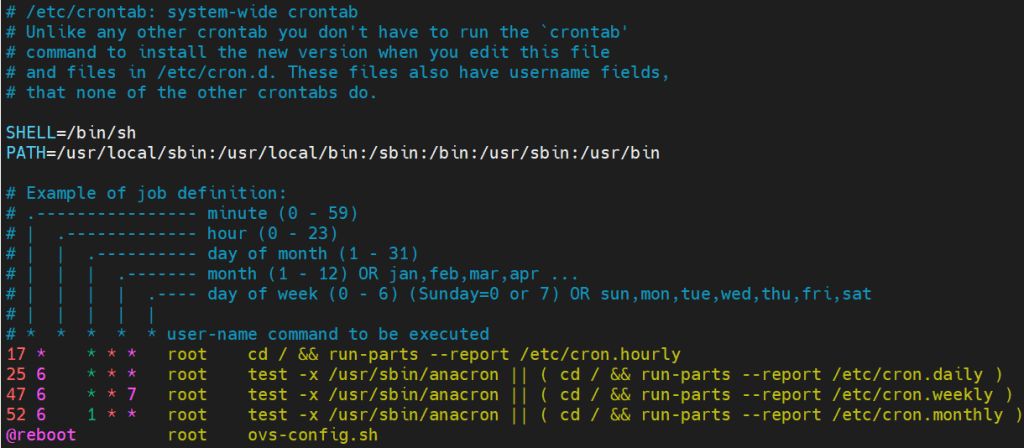
We will make the script run on boot.


If this works correctly, our vm will be natively in vlan 4. It will also be able to communicate with vlan interfaces in any of the configured vlans on the trunk port.

Now our vm has network access
You will need to add tags to a vm’s interface whenever they are powered off and back on again.
I really enjoyed migrating from Hyper-V to kvm. I learned so much. Thank you for your time and have a great day!
If you need assistance finishing the installation. Here is the link to a Ubuntu installation tutorial.
